


Listen to This Article
How to Host a PHP Website with MySQLi on a VPS
1. Get a VPS
Choose a VPS provider such as DigitalOcean, AWS EC2, Linode, Vultr, or Hostinger. Follow their instructions to create and configure your VPS.
2. Access Your VPS
Use SSH to access your VPS using the command:
ssh root@your_vps_ip3. Update Your VPS
Before installing software, update your VPS:
apt update && apt upgrade -y yum update -y 4. Install Apache Web Server
Install Apache to serve your website:
apt install apache2 -y yum install httpd -y 5. Install PHP
Install PHP and necessary modules:
apt install php php-mysqli php-cli php-fpm php-mbstring php-curl php-xml -y yum install php php-mysqli php-cli php-fpm php-mbstring php-curl php-xml -y 6. Install MySQL Database
Install MySQL or MariaDB for database management:
apt install mysql-server -y yum install mysql-server -y 7. Create a MySQL Database and User
Log in to MySQL and create a database and user:
CREATE DATABASE my_database; CREATE USER 'my_user'@'localhost' IDENTIFIED BY 'my_password'; GRANT ALL PRIVILEGES ON my_database.* TO 'my_user'@'localhost';8. Upload Your Website Files
You can use FTP or SCP to upload your website files to the server. Place them in the /var/www/html directory.
9. Set Proper Permissions
Set the correct permissions for the Apache server to access your files:
chown -R www-data:www-data /var/www/html chmod -R 755 /var/www/html10. Test Your Website
Visit your server's IP or domain to test your website:
http://your_vps_ip11. Configure Virtual Host (Optional)
If you’re hosting multiple sites, set up a virtual host:
nano /etc/apache2/sites-available/mydomain.com.conf nano /etc/httpd/conf.d/mydomain.com.conf 12. Setup SSL (Optional)
Use Let’s Encrypt to install SSL certificates:
certbot --apache -d mydomain.com -d www.mydomain.com13. Configure PHP and MySQLi for Your Website
Ensure your PHP code uses MySQLi to connect to the database:
                <?php
                    $servername = "localhost";
                    $username = "my_user";
                    $password = "my_password";
                    $dbname = "my_database";

                    $conn = new mysqli($servername, $username, $password, $dbname);

                    if ($conn->connect_error) {
                        die("Connection failed: " . $conn->connect_error);
                    }

                    // Your code to fetch or insert data goes here

                    $conn->close();
                ?>
14. Troubleshooting
Check Apache and MySQL logs for errors:
tail -f /var/log/apache2/error.log tail -f /var/log/httpd/error_log  Unlock Your Savings Today!
Get the best deals with unbeatable service and exclusive offers.
You May Also Like - More to Explore
3 Min Read Time
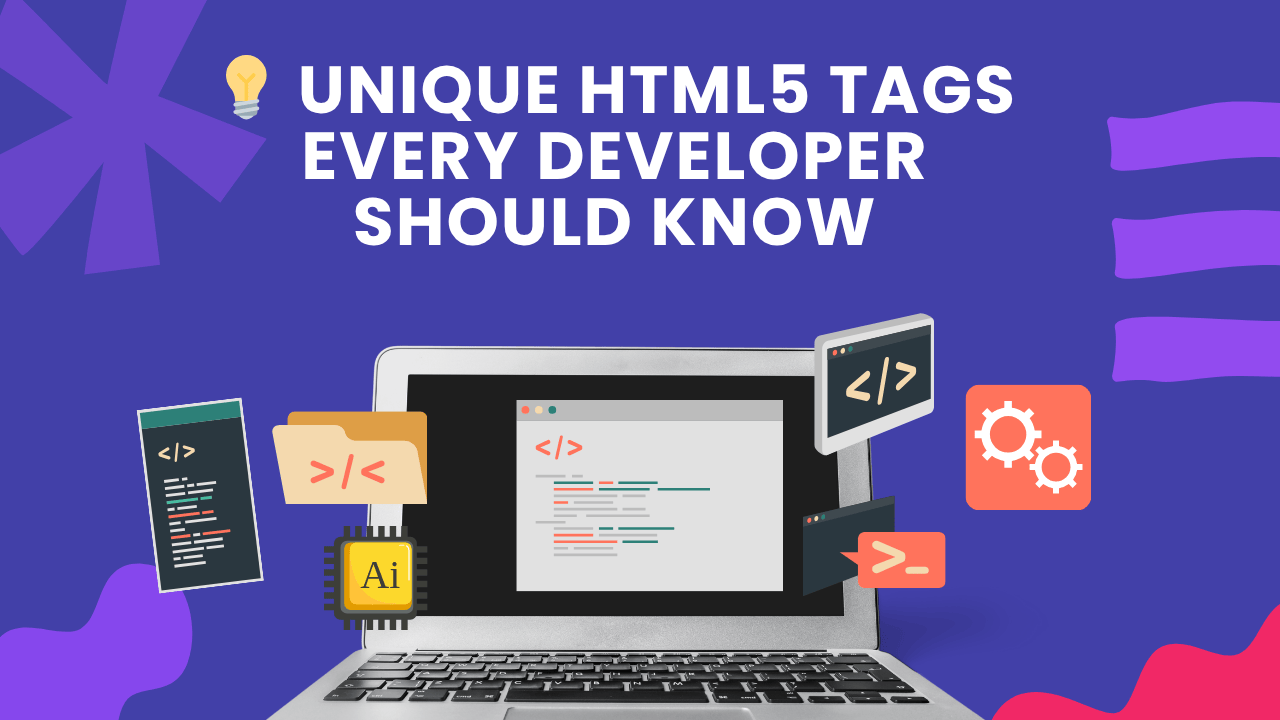
1.9k ViewsUnique HTML5 Tags Every Developer Should Know
HTML5 introduced a range of new tags that do more than just structure content — they enhance accessibility, improve SEO, an... Explore More
 Ashwani Kumar
2025-05-28
Ashwani Kumar
2025-05-28

6 Min Read Time
1.9k ViewsFinal Year Web Development Projects with Source Code
Get industry-ready web development projects for final year students with full source code, documentation, and live deployment... Explore More
Ashwani Kumar
2025-04-21
 Grow Your Business with Proven Digital Marketing
Ready to attract more customers and outshine your competition? Our tailored digital marketing strategies help you rank higher, generate qualified leads, and build a brand people trust. Let’s take your business to the next level.
Digital Marketing Solutions in Leading Cities
Digital Marketing Company in Ambala | Helping Local Businesses Fix Visibility, Leads & Online Trust Issues
Call +91 7982069569 to connect with a ⭐⭐⭐⭐⭐ digital marketing company in Ambala, Haryana. Quantam Minds helps local businesses grow with website development, SEO, AI optimization, Google My Business optimization, social media marketing, content creation, graphic design, and Google & Meta Ads—built for clarity, trust, and long-term results. Explore This Service
Digital Marketing Company in Laxmi Nagar | Quantam Minds
digital marketing Company in Laxmi Nagar by Quantam Minds. Boost your business with SEO, social media, ads & more. Get results-driven strategies! Explore This Service
Digital Marketing Service in Connaught Place – Quantam Minds
Boost your business with expert digital marketing services in Connaught Place. SEO, social media & Google Ads by Quantam Minds. Affordable & results-driven. Explore This Service
Digital Marketing Agency in Saket – Quantam Minds
Get affordable, result-driven digital marketing Agency in Saket. Quantam Minds offers SEO, social media, and Google Ads to boost your business growth. Explore This Service
Digital Marketing Services in Rohini
Enhance your business visibility and growth with expert digital marketing services in Rohini. Specializing in SEO, social media marketing, and Google Ads. Explore This Service
Digital Marketing Service in Karol Bagh – Quantam Minds
Get affordable and result-oriented digital marketing service in Karol Bagh. Boost your business with SEO, Social Media, and Google Ads solutions. Explore This Service
Digital Marketing Service in Pitampura – Boost Your Local Business
Drive business growth with expert digital marketing service in Pitampura. We offer SEO, social media, and paid ads tailored for local success. Explore This Service
Digital Marketing Service in Janakpuri – Top Digital Marketing Agency
Get professional and affordable digital marketing service in Janakpuri. Boost your business with SEO, social media marketing, and Google Ads for fast growth. Explore This Service
Digital Marketing Service in Preet Vihar – Quantam Minds
Boost your online presence with result-driven digital marketing in Preet Vihar. From SEO to Google Ads, get complete digital solutions for business growth. Explore This Service
Digital Marketing Service in Nehru Place – Quantam Minds
Drive business growth with expert digital marketing in Nehru Place. Quantam Minds offers SEO, PPC, Social Media, and complete online marketing solutions. Explore This Service
Digital Marketing Service in Mumbai – Quantam Minds
Boost your online visibility with top-rated digital marketing in Mumbai. Get complete solutions like SEO, Google Ads & Social Media by Quantam Minds. Explore This Service
Digital Marketing Service in Lucknow – Quantam Minds
Boost your business online with expert digital marketing in Lucknow. SEO, PPC, social media & content solutions tailored for local growth by Quantam Minds. Explore This Service
Digital Marketing Service in Chennai – Quantam Minds
Drive growth with expert digital marketing in Chennai. From SEO to social media, get customized digital marketing services by Quantam Minds for your business success. Explore This Service
Digital Marketing Service in Bangalore – Quantam Minds
Boost your online presence with expert digital marketing in Bangalore. SEO, Google Ads, social media—get complete growth solutions for your business. Explore This Service
Digital Marketing Service in Kolkata – Quantam Minds
Boost your business with expert digital marketing in Kolkata. From SEO to social media, Quantam Minds helps you grow online in key areas like Salt Lake, Park Street & Rajarhat. Explore This Service
Digital Marketing Service in Ahmedabad – Quantam Minds
Scale your business online with expert digital marketing in Ahmedabad. Quantam Minds specializes in SEO, PPC, and social media marketing in GIFT City, SG Highway, and Prahladnagar. Explore This Service
Digital Marketing Service in Jaipur – Quantam Minds
Boost your online presence with expert digital marketing in Jaipur. Quantam Minds offers SEO, social media, and PPC services in key areas like Vaishali Nagar, MI Road, and Jagatpura. Explore This Service
Digital Marketing Services in Indore – Quantam Minds
Get top-rated digital marketing services in Indore. Quantam Minds helps you grow online through SEO, social media, and PPC across Vijay Nagar, AB Road, and Palasia. Explore This Service
Digital Marketing Services in Kochi – Quantam Minds
Grow your business with the best digital marketing agency in Kochi. Quantam Minds offers SEO, social media marketing, PPC, and more for startups & enterprises. Explore This Service
Digital Marketing Services in Ludhiana – Quantam Minds
Boost your business with the best digital marketing agency in Ludhiana. Quantam Minds offers SEO, social media marketing, PPC, and more for local and global success. Explore This Service
Digital Marketing Services in Bhopal – Quantam Minds
Grow your Bhopal business with Quantam Minds, a top-rated digital marketing company in Bhopal. Get expert SEO, social media, PPC & more. Explore This Service
Digital Marketing Company in Jabalpur – Quantam Minds
Grow your Jabalpur-based business with the best digital marketing agency in Jabalpur. Quantam Minds offers SEO, PPC, social media, and more for startups & enterprises. Explore This Service
Digital Marketing Company in Gwalior – Quantam Minds
Boost your brand with the best digital marketing company in Gwalior. Quantam Minds offers SEO, PPC, and social media marketing for startups and enterprises. Explore This Service
digital marketing company in Ujjain – Quantam Minds
row your business with the best digital marketing agency in Ujjain. Quantam Minds offers SEO, PPC, social media marketing & local SEO services. Explore This Service
Digital Marketing Company in Gurgaon | Offers SEO, Web Development & GMB Optimization
Quantam Minds offers website development, SEO, AI optimization, Google My Business optimization, social media marketing, content creation, graphic design, app and software development, plus Google & Meta Ads Explore This Service
Digital Marketing Agency in Faridabad | Offers SEO, Web Development & GMB Optimization
Quantam Minds offers website design and development, SEO, AI optimization, Google My Business optimization, social media marketing, content creation, graphic design, app and software development, along with Google & Meta Ads—focused on clarity, trust, and long-term business growth for Faridabad-based companies. Explore This Service
Digital Marketing Company in Panipat | Offers website development, SEO, AI optimization, Google My Business optimization
Quantam Minds offers website development, SEO, AI optimization, Google My Business optimization, social media marketing, content creation, graphic design, app development, software development, and Google & Meta Ads—focused on clarity, trust, and long-term business growth. Explore This Service
Digital Marketing Company in Karnal | SEO, Web Development & AI Marketing
Digital marketing agency in Karnal, Haryana. Quantam Minds offers website development, SEO, AI optimization, Google My Business optimization, social media marketing, content creation, graphic design, app development, software development, and Google & Meta Ads—focused on clarity, trust, and long-term business growth. Explore This Service
Digital Marketing Company in Rohtak | SEO, Web & Google Ads
Digital marketing agency in Rohtak, Haryana. Quantam Minds offers website development, SEO, AI optimization, Google My Business optimization, social media marketing, content creation, graphic design, app development, software development, and Google & Meta Ads—focused on clarity, trust, and long-term business growth. Explore This Service
Digital Marketing Agency in Hisar | SEO, Web Development & AI Growth
Digital marketing agency in Hisar, Haryana. Quantam Minds offers website development, SEO, AI optimization, Google My Business optimization, social media marketing, content creation, graphic design, app development, software development, and Google & Meta Ads—focused on clarity, trust, and long-term business growth. Explore This Service
Digital Marketing Company in Panchkula – Quantam Minds
Partner with the best digital marketing agency in Panchkula. Quantam Minds offers SEO, PPC, social media marketing, and lead generation for businesses in Panchkula. Explore This Service
Digital Marketing Company in Yamunanagar – Quantam Minds
Grow your business with the best digital marketing Company in Yamunanagar. Quantam Minds offers SEO, social media, PPC, and lead gen services for local success. Explore This Service
Digital Marketing Company in Rewari – Quantam Minds
Partner with the best digital marketing agency in Rewari. Quantam Minds offers SEO, PPC, and lead generation services tailored for Rewari businesses. Explore This Service
Digital Marketing Company in Sirsa – Quantam Minds
Grow your brand with the best digital marketing agency in Sirsa. Quantam Minds offers SEO, PPC, social media, and digital growth services in Sirsa. Explore This Service
Digital Marketing Company in Jind – Quantam Minds
Get expert digital marketing services in Jind by Quantam Minds. Best digital marketing agency in Jind for SEO, PPC, lead generation & online branding Explore This Service
Digital Marketing Agency in kanpur – Quantam Minds
Grow your business online with the best digital marketing agency in Kanpur. Quantam Minds offers SEO, paid ads, and full digital strategies that work. Explore This Service
Digital Marketing Company in Agra – Quantam Minds
Partner with the best digital marketing agency in Agra. Quantam Minds offers SEO, Google Ads, lead generation, and online branding services for Agra businesses Explore This Service
Digital Marketing Company in Ghaziabad – Quantam Minds
Grow your business online with the best digital marketing agency in Ghaziabad. Quantam Minds offers SEO, PPC, social media & full digital solutions Explore This Service
Digital Marketing Agency in Meerut – Quantam Minds
Work with the best digital marketing agency in Meerut. Quantam Minds offers local SEO, social media, PPC & lead generation services tailored for Meerut businesses. Explore This Service
Digital Marketing Agency in Varanasi – Quantam Minds
Grow your business with the best digital marketing agency in Varanasi. Quantam Minds offers SEO, paid ads, local SEO & content marketing solutions. Explore This Service
Best Digital Marketing Agency in Allahabad | Quantam Minds
Looking for the best digital marketing agency in Allahabad ? Quantam Minds offers SEO, Google Ads, and online branding for businesses across Allahabad. Explore This Service
Digital Marketing Agency in Aligarh – Quantam Minds
Grow your business with the best digital marketing agency in Aligarh. Quantam Minds offers SEO, social media, Google Ads & website development for Aligarh businesses Explore This Service
Digital Marketing Agency in Bareilly – Quantam Minds
Looking for the digital marketing agency in Bareilly? Quantam Minds offers SEO, Google Ads, social media marketing, and lead generation for local businesses. Explore This Service
Digital Marketing Agency in Ayodhya – Quantam Minds
Looking for the best digital marketing agency in Ayodhya? Quantam Minds offers SEO, Google Ads, social media marketing, and website solutions for local growth Explore This Service
Digital Marketing Agency in Moradabad – Quantam Minds
Looking for the digital marketing agency in Moradabad? Quantam Minds offers SEO, Google Ads, social media marketing, and lead generation for local businesses. Explore This Service
Best Digital Marketing Agency in Saharanpur – Quantam Minds
Grow your business online with result-driven digital marketing in Saharanpur. Quantam Minds helps local brands boost visibility, leads, and sales through SEO, Google Ads, and social media strategies. 📈 Explore This Service
Digital Marketing Agency in Gorakhpur to Grow Your Local Business
Reach more customers in Gorakhpur with expert SEO, social media, and ads. Boost visibility and sales with digital marketing tailored for local growth. Explore This Service
Digital Marketing Agency in Jhansi – Quantam Minds
Looking for the best digital marketing agency in Jhansi? Quantam Minds offers SEO, Google Ads, social media marketing, and lead generation for local businesses. Explore This Service
Digital Marketing Company in Surat – Quantam Minds
Looking for the digital marketing agency in Surat? Quantam Minds offers SEO, Google Ads, social media marketing, and lead generation for local businesses. Explore This Service
Digital Marketing Company in Chandigarh | Offers Website Development, SEO, AI Optimization, Google My Business Optimization
Quantam Minds offers website development, SEO, AI optimization, Google My Business optimization, social media marketing, content creation, graphic design, app development, software solutions, and Google & Meta Ads—focused on clarity, trust, and long-term business growth for Chandigarh-based companies. Explore This Service
Best Digital Marketing Company in Noida – Quantam Minds
Grow your Noida business online with the best digital marketing company. Get more leads and sales with SEO, PPC, and social media marketing. Explore This Service
Best Digital Marketing Company in Greater Noida – Quantam Minds
Grow your Greater Noida business online with the best digital marketing company. Get more leads and sales with SEO, PPC, and social media marketing. Explore This Service
Best Digital Marketing Company in Pune – Quantam Minds
Partner with the top digital marketing agency in Pune for SEO, social media, and Google Ads that drive growth. Explore This Service
Best Digital Marketing Company in Nagpur – Quantam Minds
Partner with the top digital marketing agency in Nagpur for SEO, social media, and Google Ads that drive growth. Explore This Service
Best Digital Marketing Company in Raipur – Quantam Minds
Grow your Raipur business online with the best digital marketing company. Get more leads and sales with SEO, PPC, and social media marketing. Explore This Service
Best Digital Marketing Company in Ranchi – Quantam Minds
Partner with the top digital marketing agency in Ranchi for SEO, social media, and Google Ads that drive growth. Explore This Service
Best Digital Marketing Company in Patna – Quantam Minds
Looking for the best digital marketing agency in Patna? Quantam Minds offers SEO, Google Ads, social media marketing, and lead generation for local businesses. Explore This Service
Digital Marketing Company in Bhubaneswar – Quantam Minds
Looking for the best digital marketing agency in Bhubaneswar? Quantam Minds offers SEO, Google Ads, social media marketing, and lead generation for local businesses. Explore This Service
Digital Marketing Company in Guwahati – Quantam Minds
Looking for the best digital marketing agency in Guwahati? Quantam Minds offers SEO, Google Ads, social media marketing, and website development for local businesses. Explore This Service
Digital Marketing Company in Dehradun – Quantam Minds
Looking for the best digital marketing agency in Dehradun? Quantam Minds offers SEO, Google Ads, social media marketing, and lead generation for local businesses. Explore This Service
Digital Marketing Company in Haridwar – Quantam Minds
Looking for the best digital marketing agency in Haridwar? Quantam Minds offers SEO, Google Ads, social media marketing, and lead generation for local businesses. Explore This Service
Digital Marketing Company in Rishikesh – Quantam Minds
Looking for the best digital marketing agency in Rishikesh? Quantam Minds offers SEO, Google Ads, social media marketing, and lead generation for local businesses. Explore This Service
Digital Marketing Company in Amritsar – Quantam Minds
Looking for the digital marketing company in Amritsar? Quantam Minds offers SEO, Google Ads, social media marketing, and lead generation for local businesses. Explore This Service
Digital Marketing Company in Jalandhar – Quantam Minds
Looking for the best digital marketing Company in Jalandhar? Quantam Minds offers SEO, Google Ads, social media marketing, and lead generation for local businesses. Explore This Service
Digital Marketing Company in Jammu – Quantam Minds
Looking for the best digital marketing agency in Jammu? Quantam Minds offers SEO, Google Ads, social media marketing, and lead generation for local businesses Explore This Service
Digital Marketing Company in Srinagar – Quantam Minds
Looking for the best digital marketing agency in Srinagar? Quantam Minds offers SEO, Google Ads, social media marketing, and lead generation for local businesses. Explore This Service
Digital Marketing Company in Vadodara – Quantam Minds
Looking for the best digital marketing agency in Vadodara? Quantam Minds offers SEO, Google Ads, social media marketing, and lead generation for local businesses. Explore This Service
Digital Marketing Company in Rajkot – Quantam Minds
Looking for the best digital marketing company in Rajkot? Quantam Minds offers SEO, Google Ads, social media marketing, and lead generation for local businesses. Explore This Service
Digital Marketing Agency in Bhavnagar – Quantam Minds
Looking for the best digital marketing agency in Bhavnagar? Quantam Minds offers SEO, Google Ads, social media marketing, and lead generation for local businesses. Explore This Service
Digital Marketing Agency in Gandhinagar – Quantam Minds
Looking for the best digital marketing agency in Gandhinagar? Quantam Minds offers SEO, Google Ads, social media marketing, and lead generation for local businesses. Explore This Service
Digital Marketing Agency in Anand – SEO, PPC & Social Media Experts
Looking for the best digital marketing agency in Anand? Quantam Minds offers SEO, Google Ads, social media marketing, and lead generation for local businesses. Explore This Service
Best Digital Marketing Company in Jamnagar – Quantam Minds
Looking for the best digital marketing agency in Jamnagar? Quantam Minds offers SEO, Google Ads, social media marketing, and lead generation for local businesses. Explore This Service
Best Digital Marketing in Mehsana – Quantam Minds
Looking for the best digital marketing agency in Mehsana? Quantam Minds offers SEO, Google Ads, social media marketing, and lead generation for local businesses. Explore This Service
Digital Marketing Company in Vapi – Quantam Minds
Looking for the best digital marketing agency in Vapi? Quantam Minds offers SEO, Google Ads, social media marketing, and lead generation for local businesses. Explore This Service
Best Digital Marketing Company in Kurukshetra – SEO, Google Ads, social media marketing
Looking for the best digital marketing agency in Kurukshetra? Quantam Minds offers SEO, Google Ads, social media marketing, and lead generation for local businesses. Explore This Service
Best Digital Marketing Company in Kaithal – Quantam Minds
Looking for the best digital marketing agency in Kaithal? Quantam Minds offers SEO, social media, Google Ads, and lead generation for local businesses. Explore This Service
Best Digital Marketing Agency in Fatehabad – Quantam Minds
Looking for the best digital marketing agency in Fatehabad? Quantam Minds offers SEO, Google Ads, social media marketing, and lead generation for local businesses. Explore This Service
Best Digital Marketing Company in Jhajjar – SEO, Google Ads, social media marketing
Looking for the best digital marketing agency in Jhajjar? Quantam Minds offers SEO, Google Ads, social media marketing, and lead generation for local businesses. Explore This Service
Digital Marketing in Bahadurgarh – SEO, Google Ads, social media marketing
Looking for the best digital marketing in Bahadurgarh? Quantam Minds offers SEO, Google Ads, social media marketing, and lead generation for local businesses. Explore This Service
Digital Marketing Agency in Lajpat Nagar – Quantam Minds
Looking for the best digital marketing agency in Lajpat Nagar? Quantam Minds offers SEO, Google Ads, social media marketing, and lead generation for local businesses. Explore This Service
Best Digital Marketing Company in South Extension – SEO, Google Ads, social media marketing
Looking for the best digital marketing agency in South Extension? Quantam Minds offers SEO, Google Ads, social media marketing, and lead generation for local businesses. Explore This Service
Best Digital Marketing Agency in Rajouri Garden – SEO, Google Ads, social media marketing
Looking for the best digital marketing agency in Rajouri Garden? Quantam Minds offers SEO, Google Ads, social media marketing, and lead generation for local businesses. Explore This Service
Digital Marketing Company in Dwarka – SEO, Google Ads, social media marketing
Looking for the best digital marketing agency in Dwarka? Quantam Minds offers SEO, Google Ads, social media marketing, and lead generation for local businesses. Explore This Service
Digital Marketing agency in Okhla – SEO, Google Ads, social media marketing
Looking for the best digital marketing agency in Okhla? Quantam Minds offers SEO, Google Ads, social media marketing, and lead generation for local businesses. Explore This Service
Best Digital Marketing Agency in Paschim Vihar – SEO, social media marketing, Google Ads
Looking for the best digital marketing agency in Paschim Vihar? Quantam Minds offers SEO, social media marketing, Google Ads, and lead generation for local businesses. Explore This Service
Digital Marketing Agency in Malviya Nagar – SEO, Google Ads, and social media marketing
Looking for the best digital marketing agency in Malviya Nagar? Quantam Minds offers SEO, Google Ads, and social media marketing for local businesses. Explore This Service
Digital Marketing Company in Patiala – SEO, Google Ads, social media marketing
Looking for the best digital marketing agency in Patiala? Quantam Minds offers SEO, Google Ads, social media marketing, and lead generation for local businesses. Explore This Service
Digital Marketing Company in Mohali – SEO, Google Ads, social media marketing
Looking for the best digital marketing agency in Mohali? Quantam Minds offers SEO, Google Ads, social media marketing, and lead generation for local businesses. Explore This Service
Digital Marketing Company in Bathinda – SEO, Google Ads, social media marketing
Looking for the best digital marketing agency in Bathinda? Quantam Minds offers SEO, Google Ads, social media marketing, and lead generation for local businesses. Explore This Service
Digital Marketing Agency in Hoshiarpur –SEO, Google Ads, social media marketing
Looking for the best digital marketing agency in Hoshiarpur? Quantam Minds offers SEO, Google Ads, social media marketing, and lead generation for local businesses. Explore This Service
Digital Marketing in Sangrur – SEO, Google Ads, social media marketing
Looking for the best digital marketing agency in Sangrur? Quantam Minds offers SEO, Google Ads, social media marketing, and lead generation for local businesses. Explore This Service
Digital Marketing Company in Abohar – SEO, Google Ads, social media marketing
Looking for the best digital marketing Company in Abohar? Quantam Minds offers SEO, Google Ads, social media marketing, and lead generation for local businesses. Explore This Service
Digital Marketing Agency in Muzaffarpur – SEO, Google Ads, social media marketing
Looking for the best digital marketing agency in Muzaffarpur? Quantam Minds offers SEO, Google Ads, social media marketing, and lead generation for local businesses. Explore This Service
Digital Marketing Agency in Darbhanga – SEO, Google Ads, social media marketing
Looking for the best digital marketing agency in Darbhanga? Quantam Minds offers SEO, Google Ads, social media marketing, and lead generation for local businesses. Explore This Service
Best Digital Marketing Agency in Bhagalpur – SEO, Google Ads, social media marketing
Looking for the best digital marketing agency in Bhagalpur? Quantam Minds offers SEO, Google Ads, social media marketing, and lead generation for local businesses. Explore This Service
Digital Marketing Agency in Gaya – SEO, Google Ads, social media marketing
Looking for the best digital marketing agency in Gaya? Quantam Minds offers SEO, Google Ads, social media marketing, and lead generation for local businesses. Explore This Service
Best Digital Marketing Company in Purnia – SEO, Google Ads, social media marketing
Looking for the best digital marketing agency in Purnia? Quantam Minds offers SEO, Google Ads, social media marketing, and lead generation for local businesses. Explore This Service
Digital Marketing in Begusarai – SEO, Google Ads, social media marketing
Looking for the best digital marketing agency in Begusarai? Quantam Minds offers SEO, Google Ads, social media marketing, and lead generation for local businesses. Explore This Service
Digital Marketing Company in Katihar – SEO, Google Ads, social media marketing
Looking for the best digital marketing agency in Katihar? Quantam Minds offers SEO, Google Ads, social media marketing, and lead generation for local businesses. Explore This Service
Digital Marketing Company in Arrah – SEO, Google Ads, social media marketing
Looking for the best digital marketing agency in Arrah? Quantam Minds offers SEO, Google Ads, social media marketing, and lead generation for local businesses. Explore This Service
Best Digital Marketing Company in Saharsa – SEO, Google Ads, social media marketing
Looking for the best digital marketing agency in Saharsa? Quantam Minds offers SEO, Google Ads, social media marketing, and lead generation for local businesses. Explore This Service
Best Digital Marketing Company in Buxar – SEO, Google Ads, social media marketing
Looking for the best digital marketing agency in Buxar? Quantam Minds offers SEO, Google Ads, social media marketing, and lead generation for local businesses. Explore This Service
Best Digital Marketing Company in Khagaria – SEO, Google Ads, social media marketing
Looking for the best digital marketing agency in Khagaria? Quantam Minds offers SEO, Google Ads, social media marketing, and lead generation for local businesses. Explore This Service
Best Digital Marketing Company in Banka – SEO, Google Ads, social media marketing
Looking for the best digital marketing agency in Banka? Quantam Minds offers SEO, Google Ads, social media marketing, and lead generation for local businesses. Explore This Service
Best Digital Marketing Company in Munger – SEO, Google Ads, social media marketing
Looking for the best digital marketing agency in Munger? Quantam Minds offers SEO, Google Ads, social media marketing, and lead generation for local businesses. Explore This Service
Best Digital Marketing Company in Dehri – SEO, Google Ads, social media marketing
Looking for the best digital marketing agency in Dehri? Quantam Minds offers SEO, Google Ads, social media marketing, and lead generation for local businesses. Explore This Service
Best Digital Marketing Company in Bettiah – SEO, Google Ads, social media marketing
Looking for the best digital marketing agency in Bettiah? Quantam Minds offers SEO, Google Ads, social media marketing, and lead generation for local businesses. Explore This Service
Best Digital Marketing Company in Nalanda – SEO, Google Ads, social media marketing
Looking for the best digital marketing agency in Nalanda? Quantam Minds offers SEO, Google Ads, social media marketing, and lead generation for local businesses. Explore This Service
Digital Marketing Company in Sitamarhi – SEO, Google Ads, social media marketing
Looking for the best digital marketing agency in Sitamarhi? Quantam Minds offers SEO, Google Ads, social media marketing, and lead generation for local businesses. Explore This Service
Digital Marketing in Roorkee – SEO, Google Ads, social media marketing
Looking for the best digital marketing agency in Roorkee? Quantam Minds offers SEO, Google Ads, social media marketing, and lead generation for local businesses. Explore This Service
Digital Marketing Company in Haldwani – SEO, Google Ads, social media marketing
Looking for the best digital marketing agency in Haldwani? Quantam Minds offers SEO, Google Ads, social media marketing, and lead generation for local businesses. Explore This Service
Digital Marketing Company in Rudrapur – SEO, Google Ads, social media marketing
Looking for the best digital marketing agency in Rudrapur? Quantam Minds offers SEO, Google Ads, social media marketing, and lead generation for local businesses. Explore This Service
Digital Marketing Company in Kashipur – SEO, Google Ads, social media marketing
Looking for the best digital marketing agency in Kashipur? Quantam Minds offers SEO, Google Ads, social media marketing, and lead generation for local businesses. Explore This Service
Digital Marketing Company in Nainital – SEO, Google Ads, social media marketing
Looking for the best digital marketing agency in Nainital? Quantam Minds offers SEO, Google Ads, social media marketing, and lead generation for local businesses. Explore This Service
Digital Marketing Company in Almora – SEO, Google Ads, social media marketing
Looking for the best digital marketing agency in Almora? Quantam Minds offers SEO, Google Ads, social media marketing, and lead generation for local businesses. Explore This Service
Digital Marketing Company in Uttarkashi – SEO, Google Ads, social media marketing
Looking for the best digital marketing agency in Uttarkashi? Quantam Minds offers SEO, Google Ads, social media marketing, and lead generation for local businesses. Explore This Service
Digital Marketing Company in Pithoragarh – SEO, Google Ads, social media marketing
Looking for the best digital marketing agency in Pithoragarh? Quantam Minds offers SEO, Google Ads, social media marketing, and lead generation for local businesses. Explore This Service
Digital Marketing Company in Tehri – SEO, Google Ads, social media marketing, and lead generation for local businesses
Looking for the best digital marketing agency in Tehri? Quantam Minds offers SEO, Google Ads, social media marketing, and lead generation for local businesses. Explore This Service
Digital Marketing Company in Bageshwar – SEO, Google Ads, social media marketing, and lead generation for local businesses
Looking for the best digital marketing agency in Bageshwar? Quantam Minds offers SEO, Google Ads, social media marketing, and lead generation for local businesses. Explore This Service
Digital Marketing Company in Champawat – SEO, Google Ads, social media marketing, and lead generation for local businesses
Looking for the best digital marketing agency in Champawat? Quantam Minds offers SEO, Google Ads, social media marketing, and lead generation for local businesses. Explore This Service
Digital Marketing Company in Chamoli – SEO, Google Ads, social media marketing, and lead generation for local businesses
Looking for the best digital marketing agency in Chamoli? Quantam Minds offers SEO, Google Ads, social media marketing, and lead generation for local businesses. Explore This Service
Digital Marketing Company in Pauri Garhwal – SEO, Google Ads, social media marketing, and lead generation for local businesses
Looking for the best digital marketing agency in Pauri Garhwal? Quantam Minds offers SEO, Google Ads, social media marketing, and lead generation for local businesses. Explore This Service
Digital Marketing Company in Bhowali – SEO, Google Ads, social media marketing, and lead generation for local businesses
Looking for the best digital marketing agency in Bhowali? Quantam Minds offers SEO, Google Ads, social media marketing, and lead generation for local businesses. Explore This Service
Digital Marketing Company in Rudraprayag – SEO, Google Ads, social media marketing, and lead generation for local businesses
Looking for the best digital marketing agency in Rudraprayag? Quantam Minds offers SEO, Google Ads, social media marketing, and lead generation for local businesses Explore This Service
Digital Marketing Agency in Sonipat | Offers website development, SEO, AI optimization, Google My Business optimization
Call +91 7982069569 to connect with a ⭐⭐⭐⭐⭐ digital marketing agency in Sonipat, Haryana. Quantam Minds offers website development, SEO, AI optimization, Google My Business optimization, social media marketing, content creation, graphic design, app development, and software solutions focused on clarity, trust, and long-term business growth. Explore This Service

 Disclaimer
The views expressed by experts in this article are their own and do not necessarily reflect the opinions of any website, organization, institution, or affiliated entity. If you have any concerns regarding this article, please contact us at contact@quantamminds.com and also on WhatsApp
Frequently Asked Questions
What are the requirements to host a PHP website?
To host a PHP website, you need:
-
A web hosting provider that supports PHP (e.g., Bluehost, Hostinger, SiteGround)
-
A domain name
-
A MySQL or MariaDB database (if required by your application)
-
An FTP client or control panel to upload files
How can I upload my PHP website to a hosting server?
You can upload your PHP website using:
-
FTP (File Transfer Protocol): Use an FTP client like FileZilla to transfer files.
-
cPanel File Manager: Upload files directly through your hosting provider’s control panel.
-
SSH (Secure Shell): If your hosting supports it, use SSH for command-line file transfers.
Do I need to configure a database when hosting a PHP website?
If your website uses a database (e.g., MySQL), you need to:
-
Create a new database using cPanel or phpMyAdmin.
-
Update the database credentials (host, username, password, database name) in your
config.phpor.envfile. -
Import your SQL database using phpMyAdmin or a command-line tool.
How do I make my PHP website live on a domain?
To connect your PHP website to a domain:
-
Purchase a domain name from a registrar like GoDaddy or Namecheap.
-
Update the domain's nameservers to match your hosting provider’s settings.
-
Upload your website files to the
public_htmlor root directory of your hosting. -
Configure DNS settings to ensure proper redirection.
How can I secure my hosted PHP website?
To keep your PHP website secure:
-
Install an SSL certificate (HTTPS) to encrypt data.
-
Keep PHP and CMS (WordPress, Laravel, etc.) updated.
-
Use secure database connections (prepared statements or PDO).
-
Set proper file permissions to prevent unauthorized access.
-
Use a web application firewall (WAF) for added protection.
Tag:
ABOUT THE AUTHOR
Ashwani Kumar is a results-driven Digital Marketing Manager at Quantam Minds, specializing in crafting and executing data-driven marketing strategies that drive brand growth and online success. With a strong background in SEO, PPC, social media marketing, and content strategy, Ashwani has a proven track record of increasing brand visibility, generating leads, and optimizing digital campaigns for maximum ROI.
- How to Fix the Black Screen Issue in Adobe Premiere Pro
-
Next


